Calibration, ablation
We're going from a typical camera calibration to a solid, validated result. This is your step-by-step guide to models, data collection, and validation best practices.
Summary
A while back, we investigated repeatability of camera calibration as a process. We compared multiple calibrations of the same camera, some taken with the standard ROS calibration tool and some with the Skip tool. The conclusion was that it really depended on how you collect the data and the type of model you use. Now we'll go deeper and see what you need to do for good results.
Where do we begin?
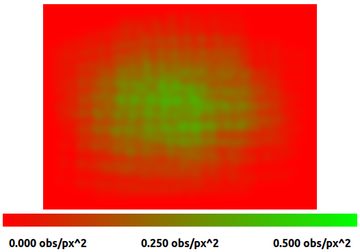
We'll start with a standard dataset collected with the ROS calibration tool. Our dataset has 45 1440x1080 images. The lens is relatively wide angle, with a 90 degree field of view. The data was collected carefully, following the instructions and on screen guide in the ROS gui. The target is an 11x7 checkerboard mounted on to a DiBond panel. So we run the calibration, and what do we get?
We get a result dominated by corner detector failures and other sources of outliers.
The basics
- Remove outliers
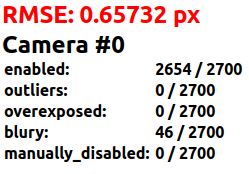
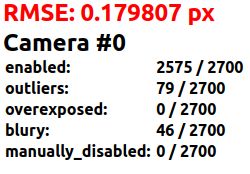
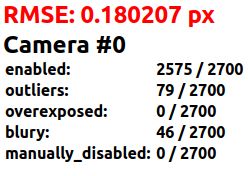
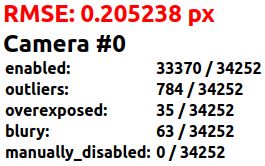
This dataset was collected with the ROS tool, but we're using the Skip tool for calibration. Our tool automatically removes blurry and overexposed corners, but there are still some corner detector failures!
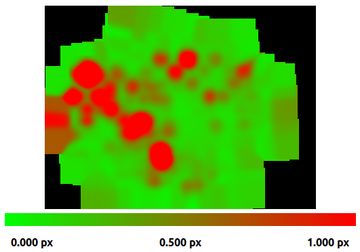
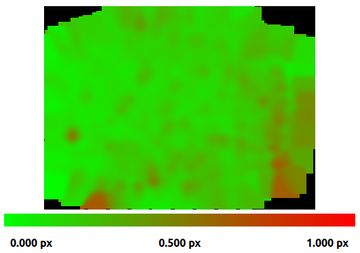
We'll remove observations with more than 1 pixel of error; these are gross errors caused by failures of the corner detector. Right away, we can see a dramatic decrease in RMSE and improved posterior accuracy.
- Turn the screws
We know modern cameras have square pixels and do not have significant skew. We can model that by constraining the camera matrix. This nets a ~12% improvement in accuracy.
Getting fancy
Now we'll use the Skip calibration tool to get the most out of this dataset.
- Targets are never flat
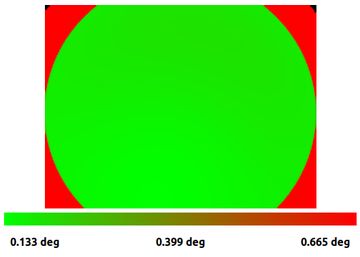
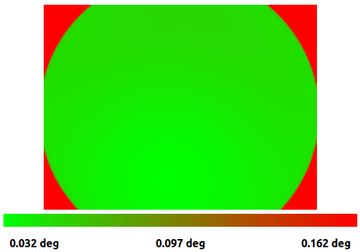
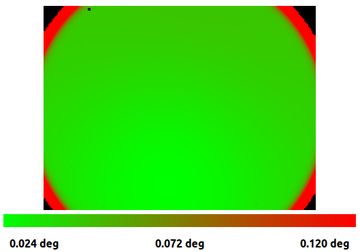
We know calibration targets are never actually flat, so we'll enable the target curvature model. This gives us a 25% accuracy improvement.
- Picking a projection
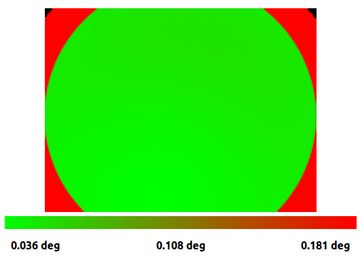
The rational polynomial model is notoriously hard to fit well. This is a wide angle lens, so we'll try equidistant projection with a less flexible RADTAN5 distortion model. The weaker camera model slightly decreases our accuracy at the image center, but dramatically improves the calibration at the corners.
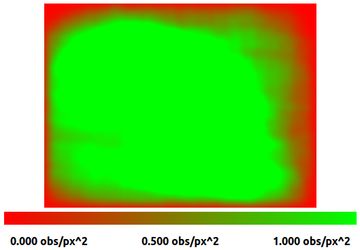
We're going to need more data
If you've read our post on intrinsic repeatability, you'll know that the datasets collected with the ROS tool did not have enough data to fully constraint the lens. We'll take a look at a larger, 642 image dataset gathered with the Skip tool and see if we can do even better.
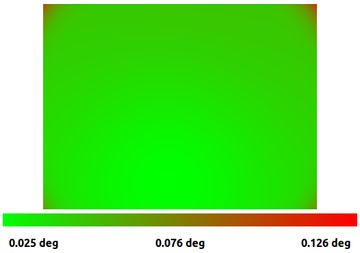
Using the same projection and distortion model with a much larger dataset naturally increases the accuracy of our estimate. The posterior accuracy improves by more than a factor of two! The RMSE, however, stays about the same throughout the whole process. More on that below.
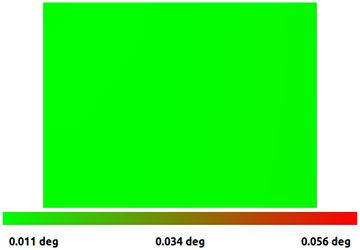
Parting thoughts
The process we've shown here is the right way to tune your camera calibration and lens model if you actually care about getting it right. Being able to visualize and understand what is going on with your data is key to getting good results. By taking the time to do this, we were able to go from a calibration with almost 1 degree of potential error at the corners, to a more uniform result with a full order of magnitude less error.
If you want to trust you camera calibrations, make sure to:
- Remove outliers. Even a few large ones can really mess up your calibration.
- Pick your model carefully. Use the simplest model that captures your lens geometry.
- Get enough data. Make sure to get good coverage at the corners.
- The RMSE lies. Don't rely on a single RMSE number for validation.